Create Course Categories
OVERVIEW
Course categories organize courses for all your LMS users. If your organization wants to group courses by purpose and display them collectively, then course categories will help you structure your LMS.

USE CASE EXAMPLE:
Let's say you have 4 courses: Sales Cold Calling, Sales Email Outbound, Marketing on Google and Marketing on Facebook. It would be a good idea to create 2 course categories to organize these courses:
Sales Training (Category 1)
Sales Training (Category 1)
> Sales Cold Calling (Course 1)
> Sales Email Outbound (Course 2)
> Sales Email Outbound (Course 2)
Marketing Training (Category 2)
> Marketing on Google (Course 3)
> Marketing on Facebook (Course 4)
Now let's guide you on how to set this up:
CREATE COURSE CATEGORIES
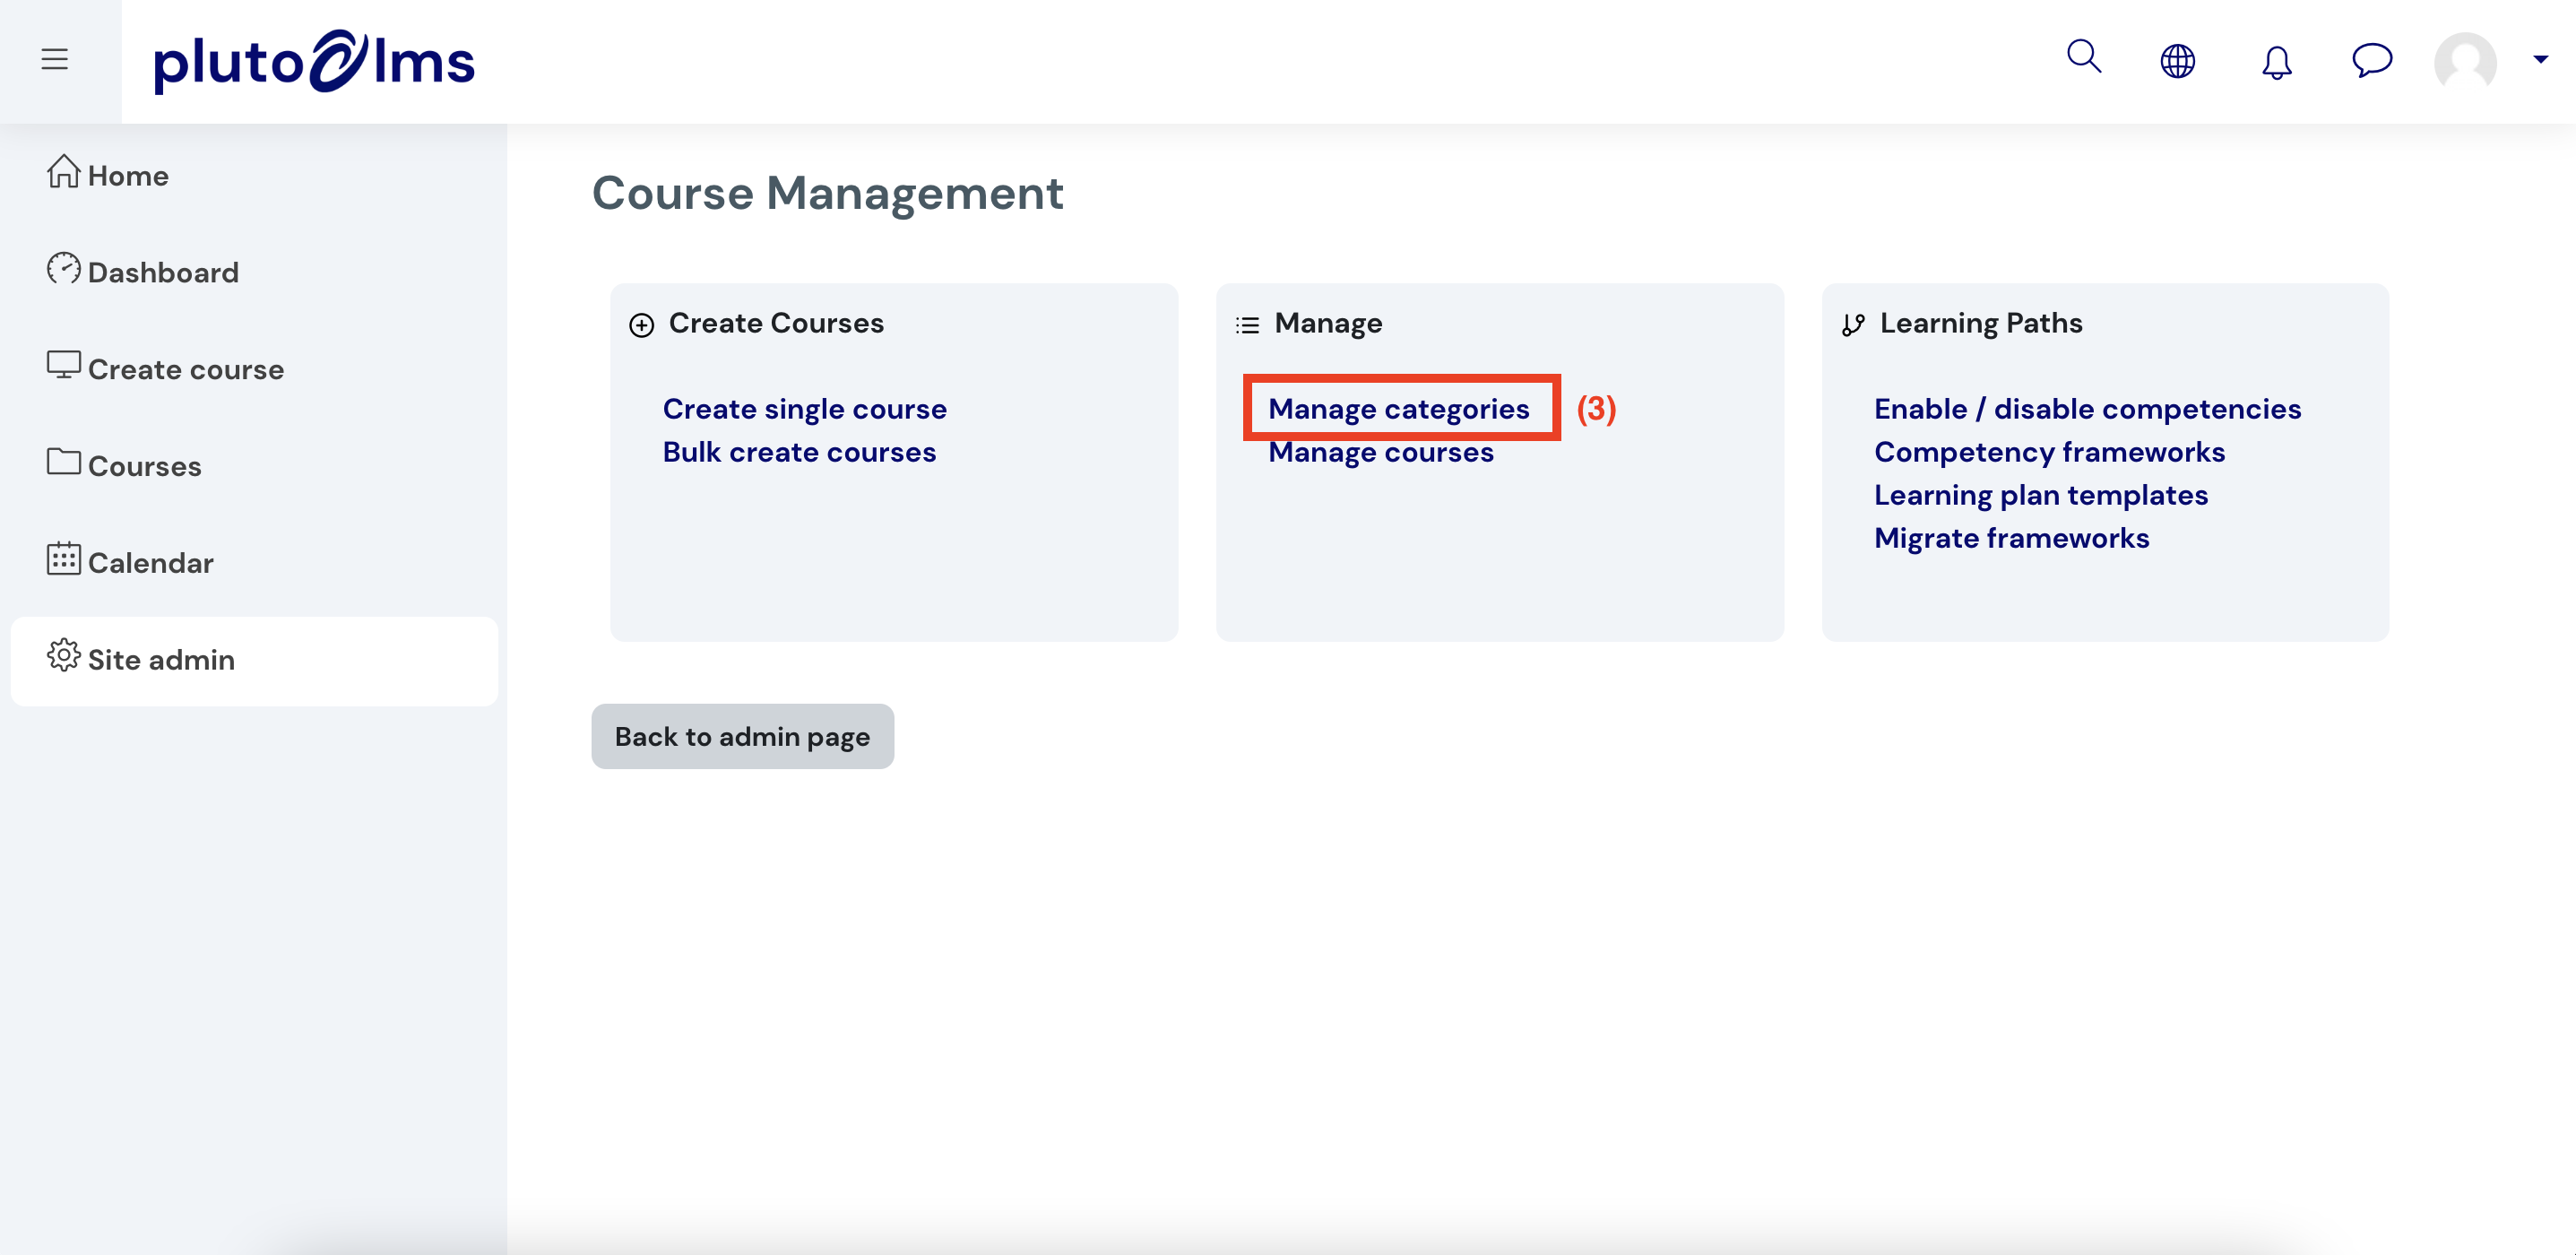
Step 1: Click on "Site admin", followed by "Course management."
then "Manage categories":
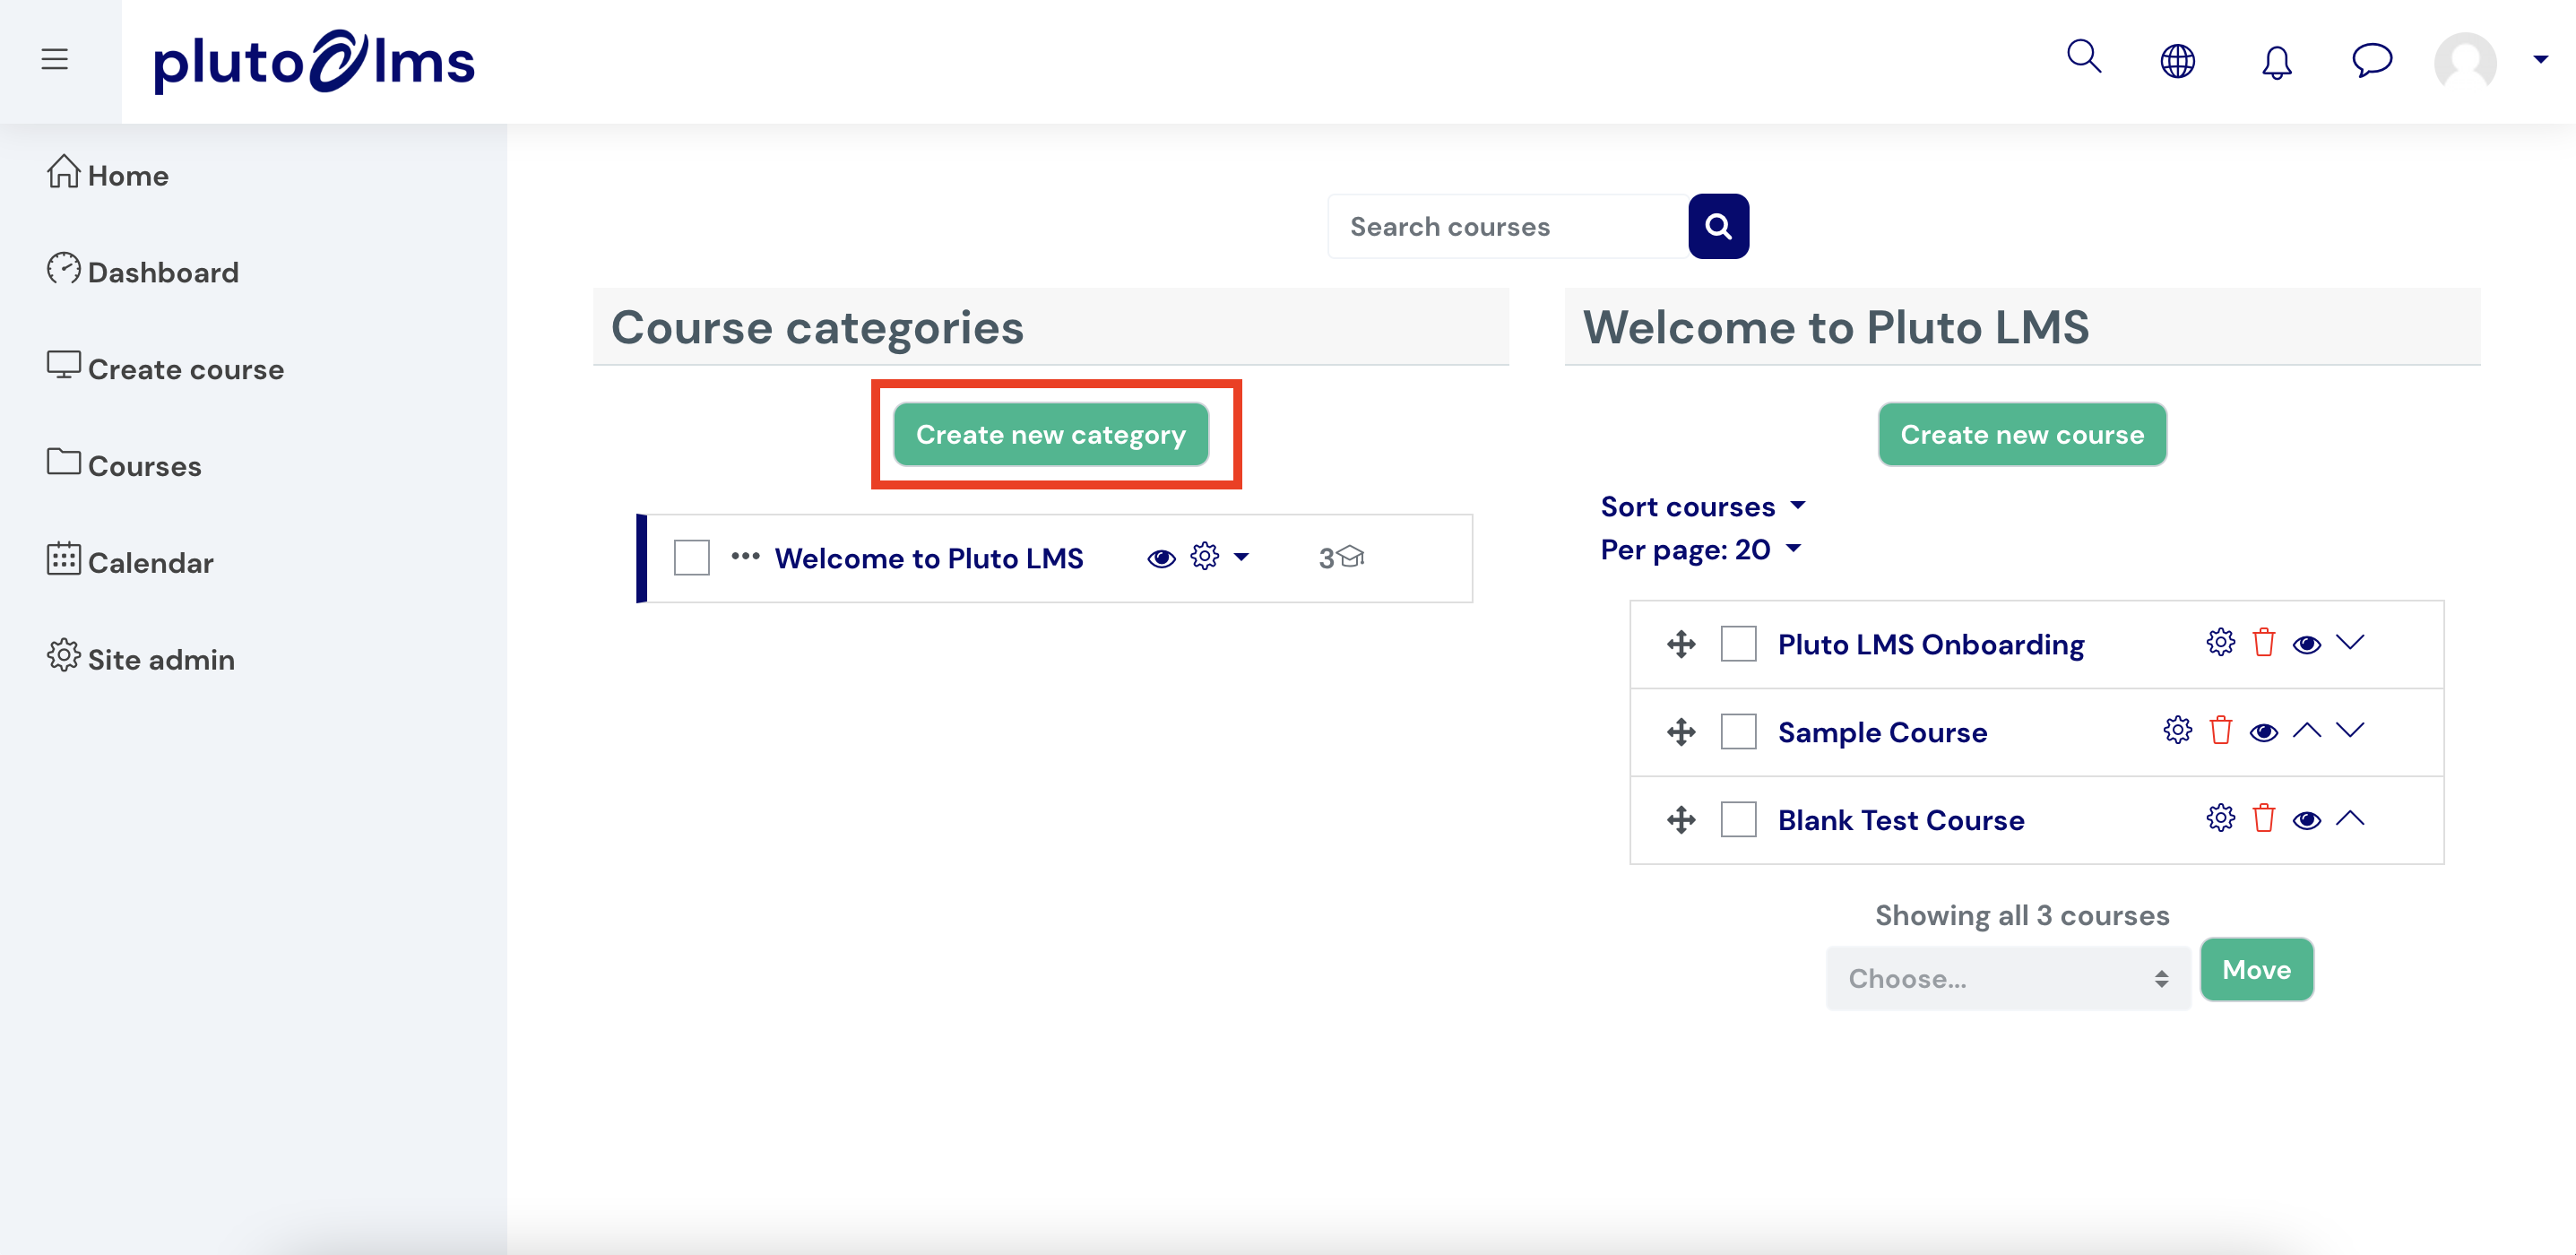
Step 2: Click on "Create new category":
Step 3: Define your category settings.
(1) Set "Parent category" as "Top" if you are creating a main category. Alternatively, create a sub-category by choosing an existing category as the parent category.
(2) Define your new category name.
Optionally, add a "Category ID number" and/or Description.
Step 4: Finally, click "Create category".
Step 4: Finally, click "Create category".
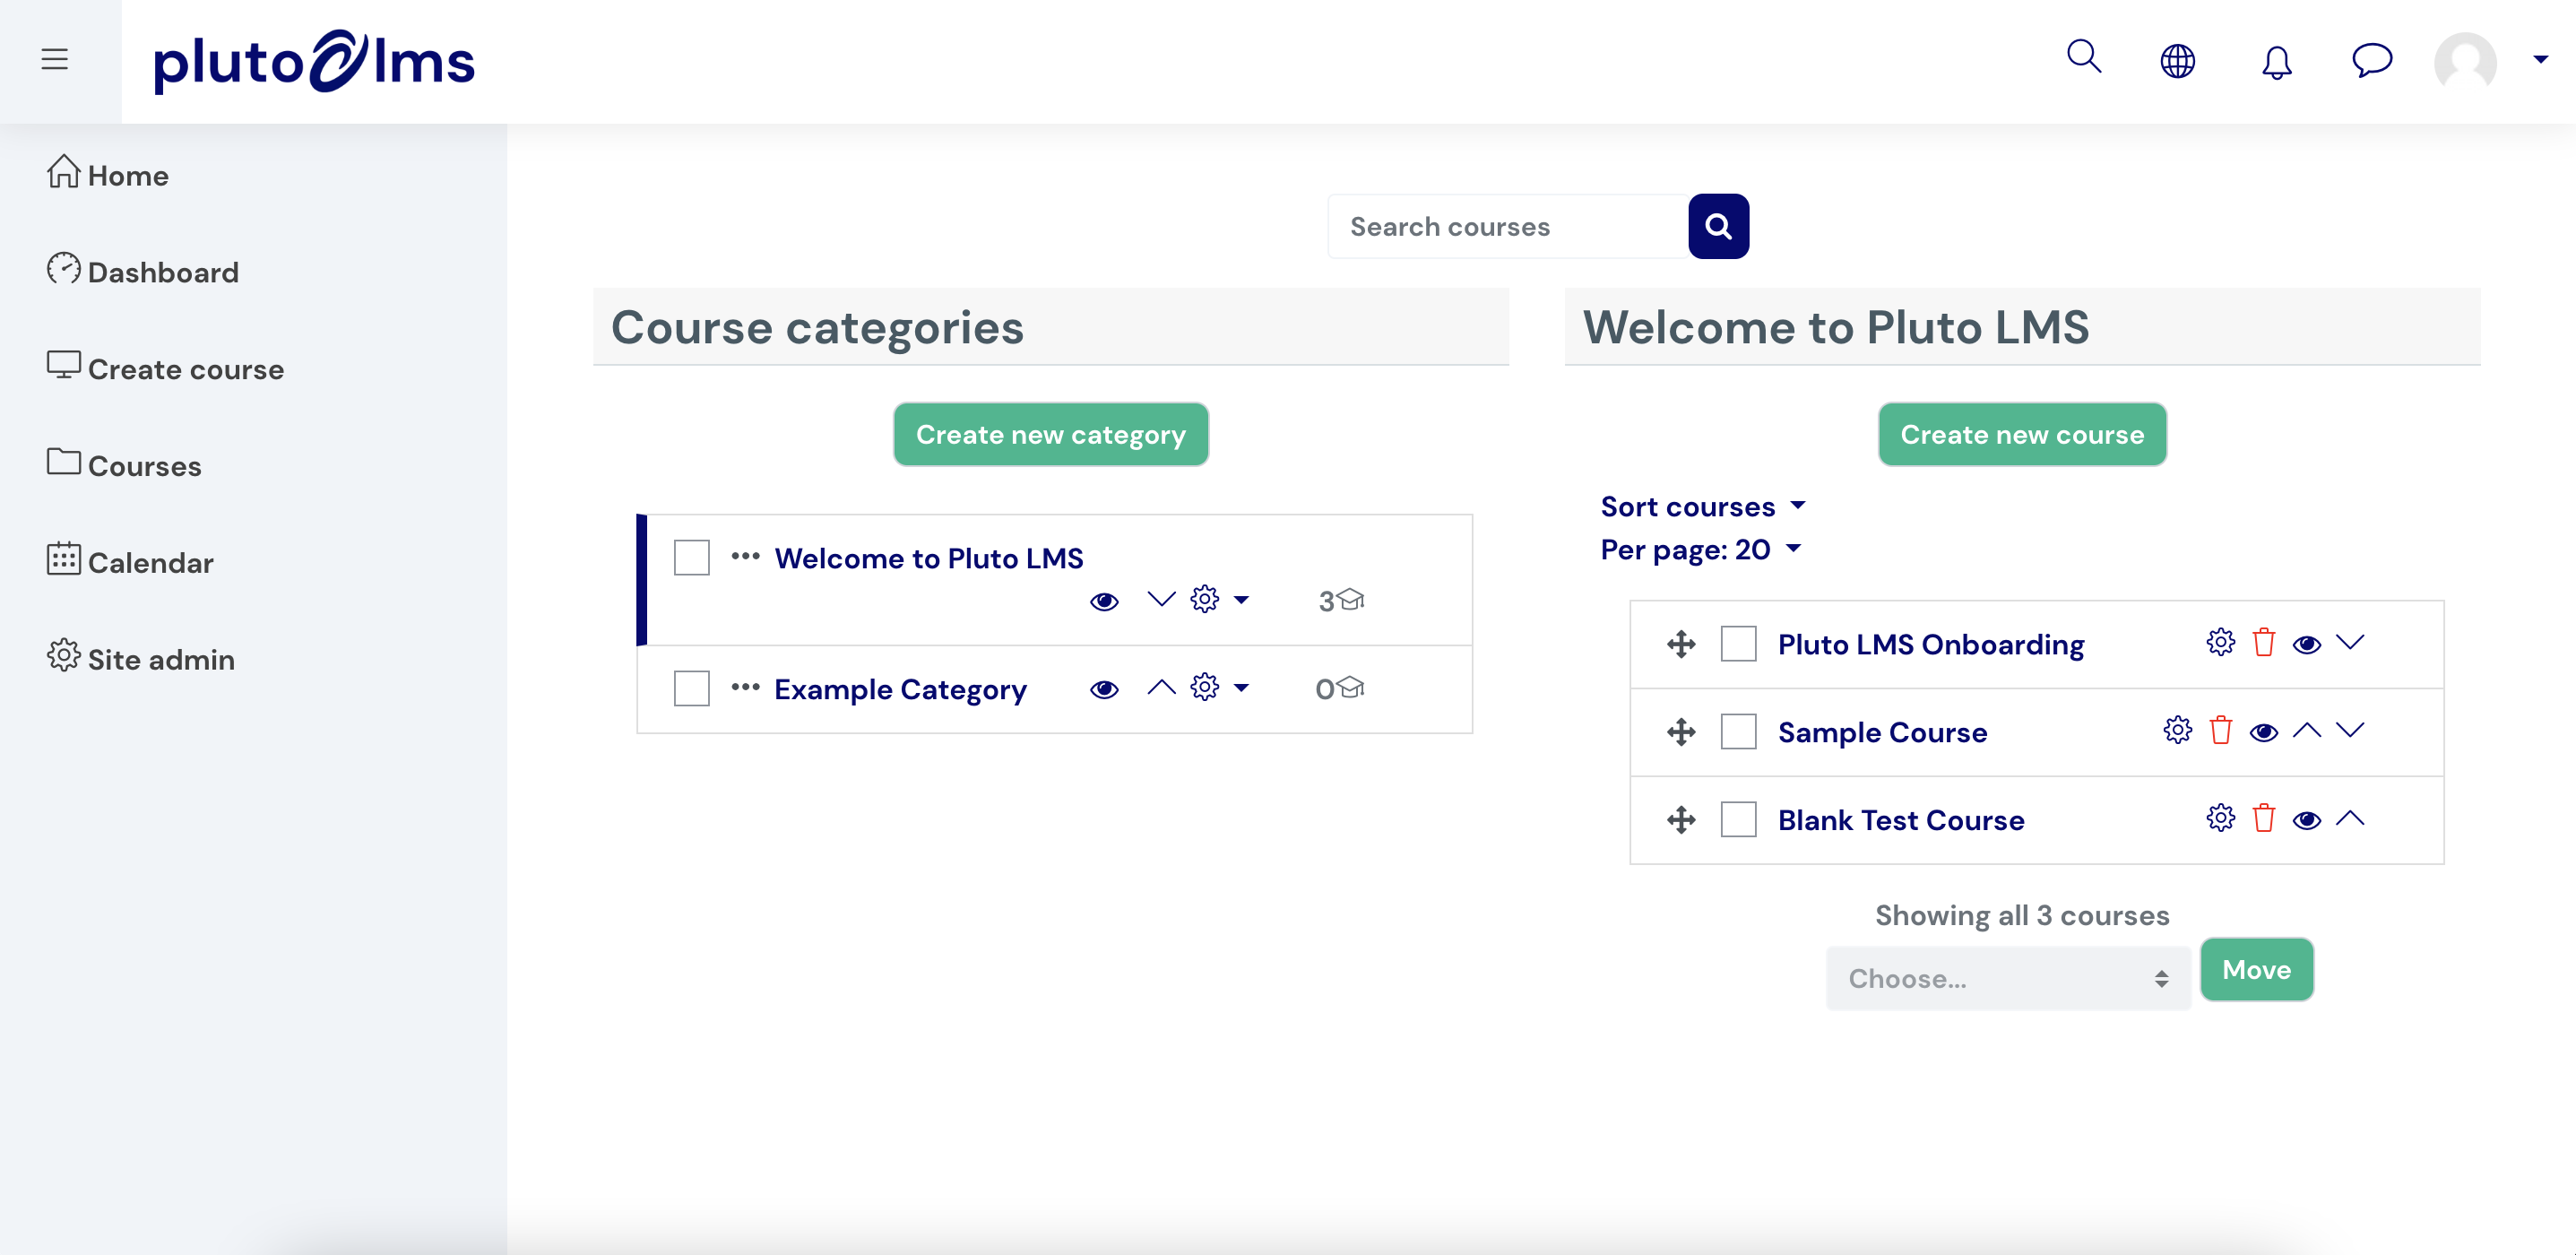
All your created categories will be listed in the course and category management page.

Note:
> You can move courses between categories, adjust settings, delete as well as hide categories and courses from here.
> You can move courses between categories, adjust settings, delete as well as hide categories and courses from here.
> You can also create sub categories and nest categories within one another.
> Categories do NOT affect your learning paths and are used purely for visual purposes.
> You can always move courses between categories later if you change your mind on your category structure. This will not affect any reports.
> You can always move courses between categories later if you change your mind on your category structure. This will not affect any reports.
 WARNING:
> If you hide a category, all courses within that category will also be hidden.
> If you want to delete a category, please move courses out of the category first (if you don't wish to delete courses within that category too).