SAML2
OAUTH2 SETTINGS IN PLUTO LMS
If you would like to created your own SAML2 SSO connection, you can with Pluto LMS.

USE CASE EXAMPLE:
Single Sign-On (SSO) for Corporate Training Portal
Scenario: A company wants to provide its employees with access to a corporate training portal based on Moodle. To simplify the login process and maintain a seamless user experience, the company decides to implement Single Sign-On (SSO) using SAML2.

Note: If you are not technical, please pass these instructions to your developer.
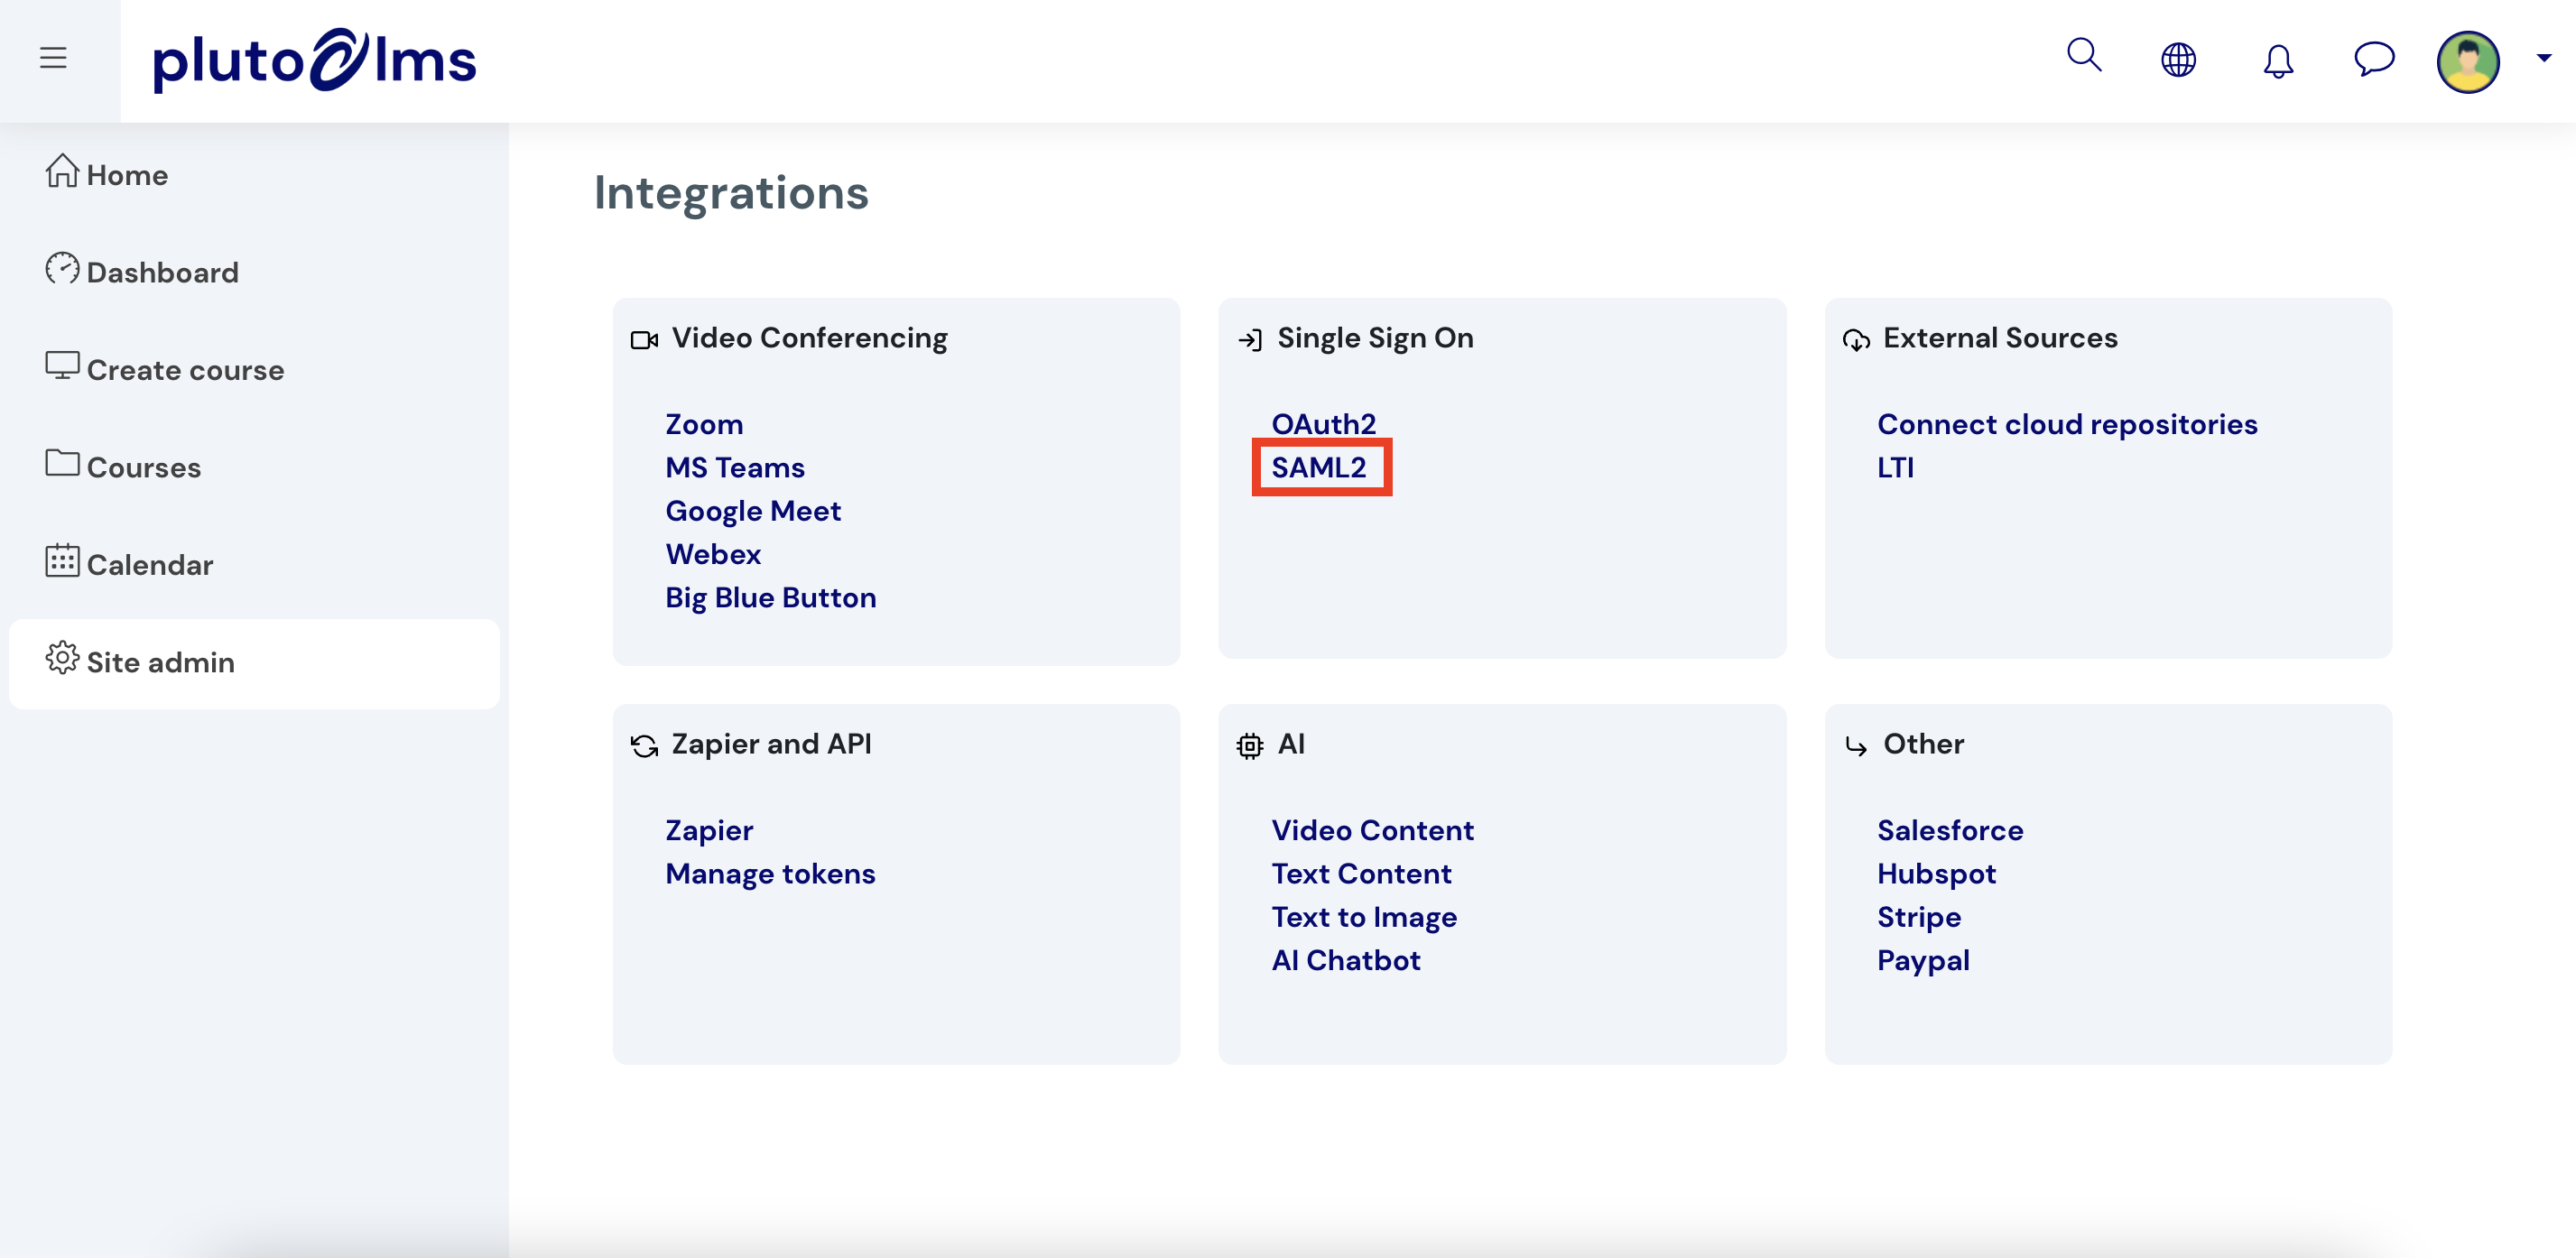
Step 1: Click on "Site admin" > "Integrations" > "SAML2":
Step 2: Authenticate with a SAML2 Identity Provider (IdP).
Step 2: Authenticate with a SAML2 Identity Provider (IdP).
> To do this, you will need to consult your IT department or the 3rd party tool you are connecting to.
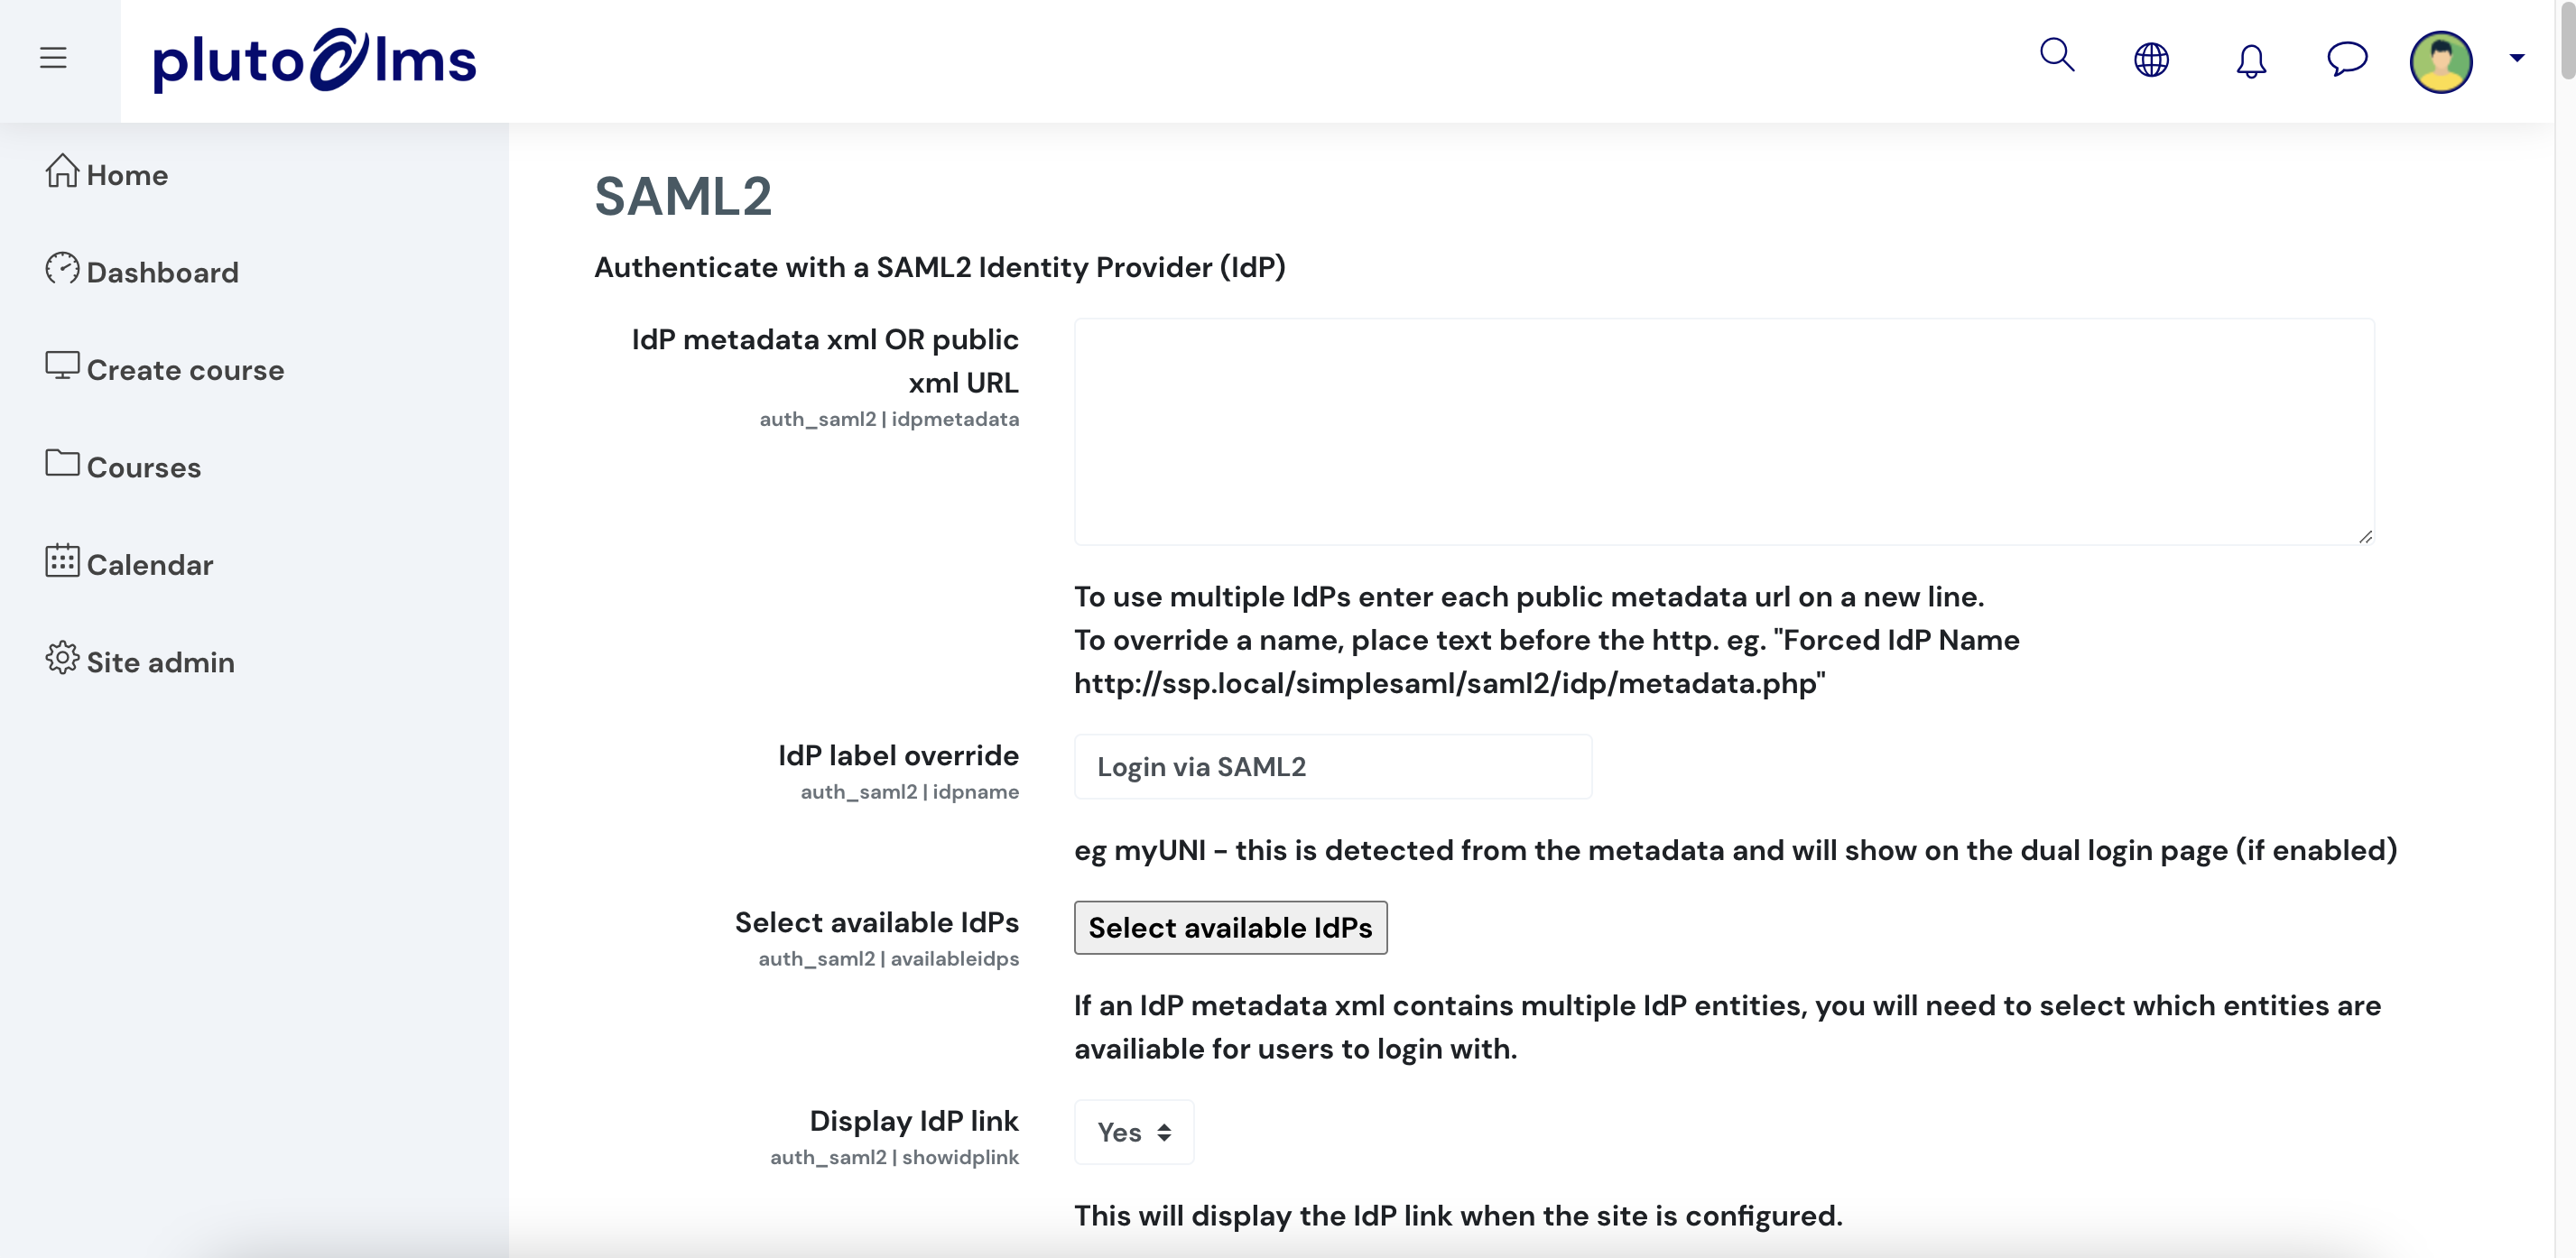
(Scroll down on the SAML2 page for more configuration options)
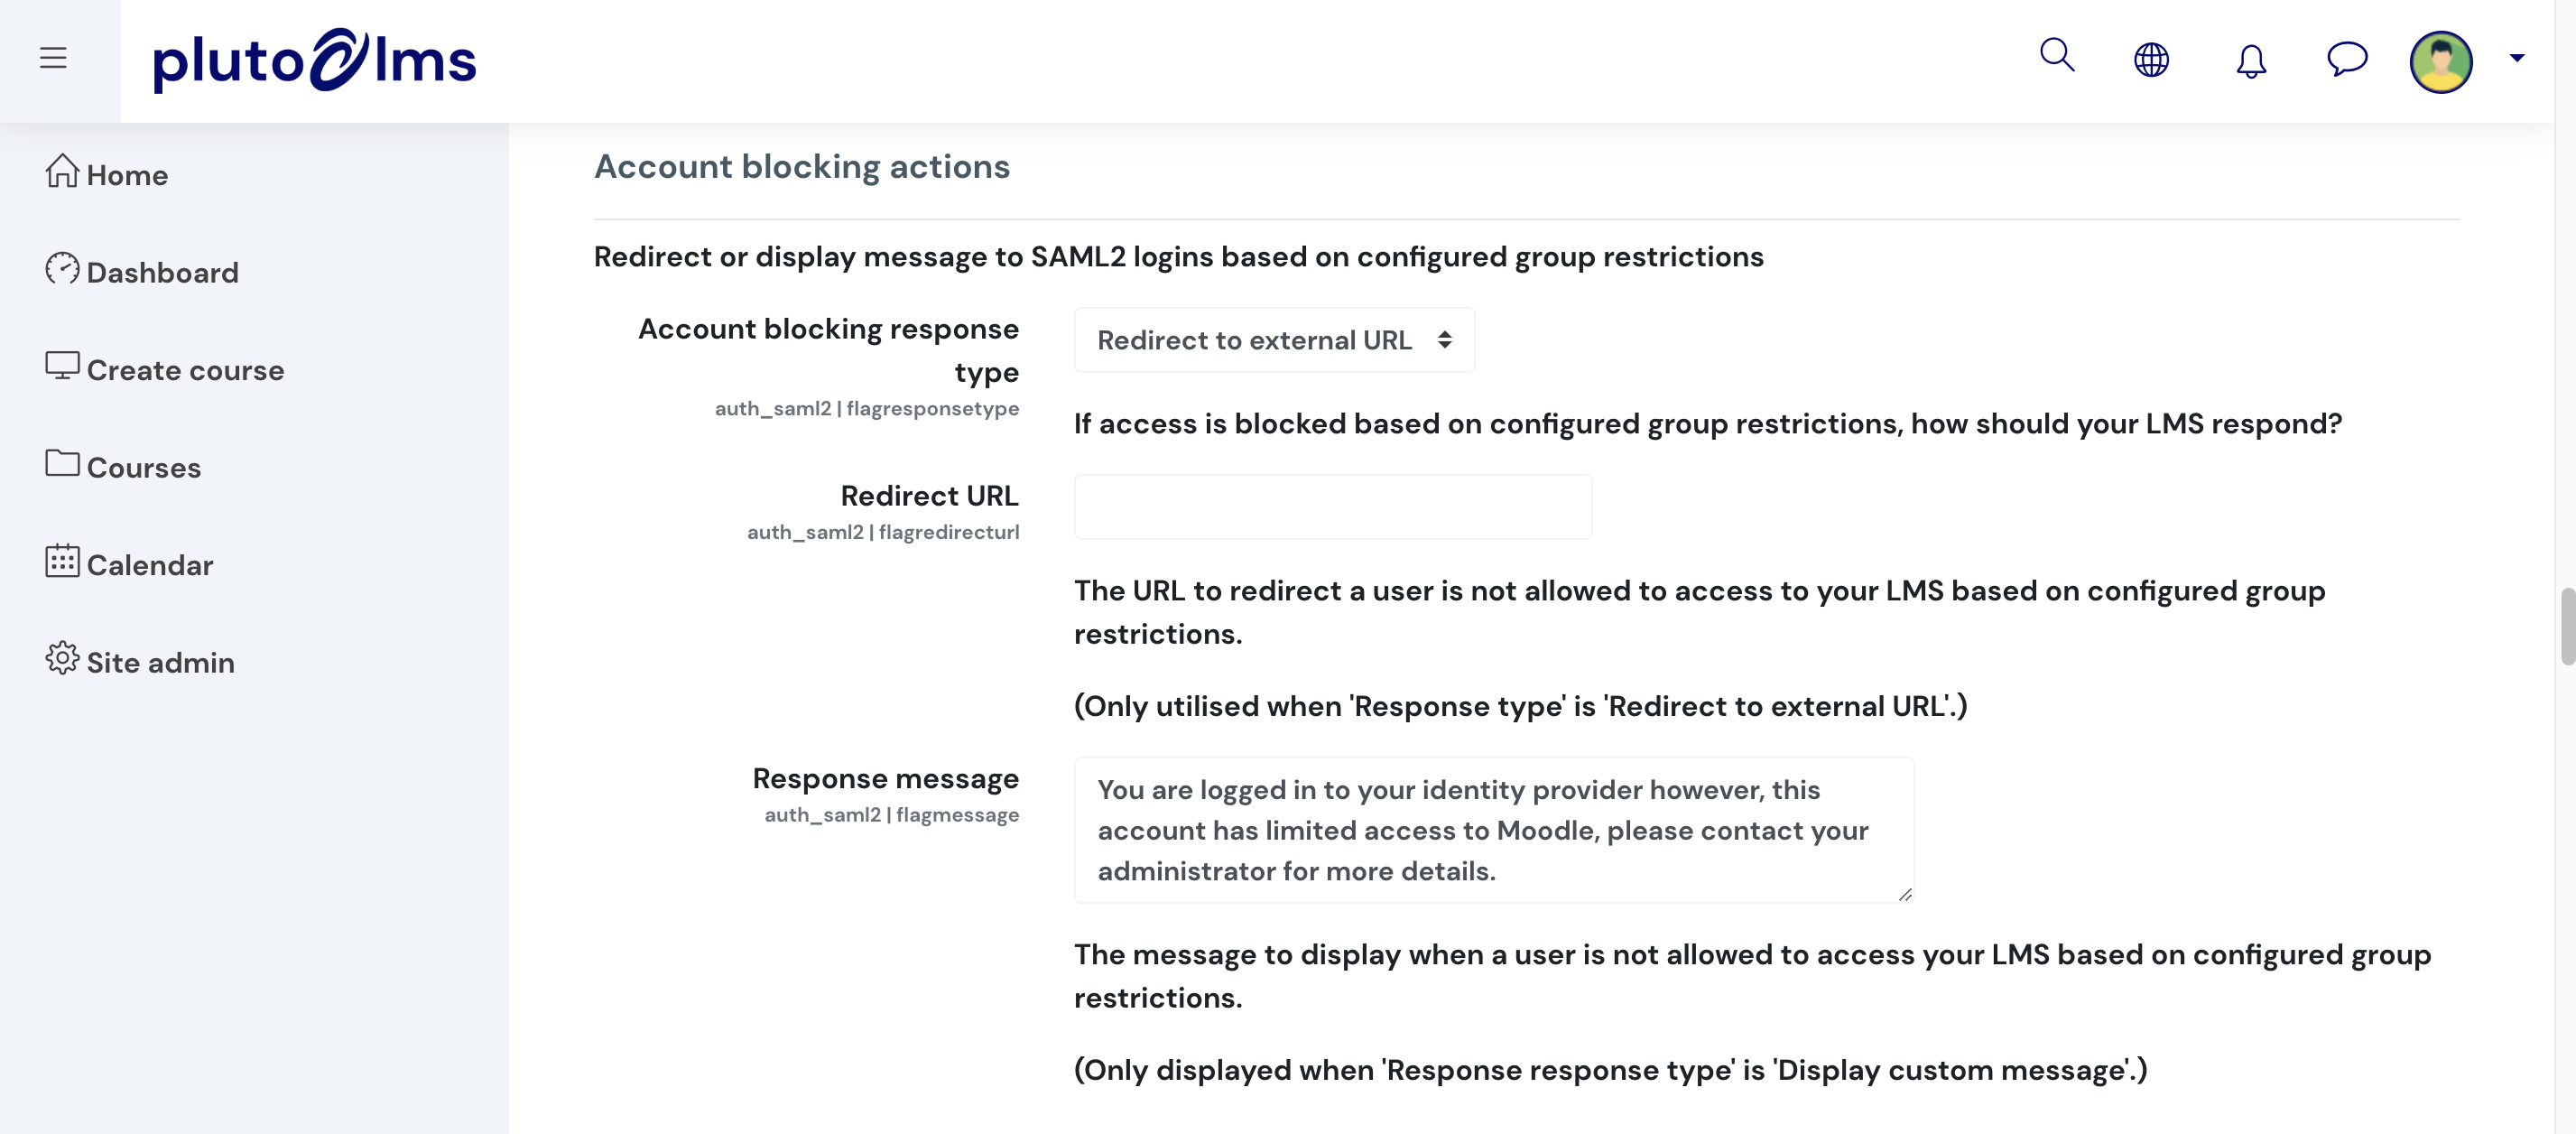
Step 3: Configure account blocking actions.
Step 4: Configure data mapping between Pluto LMS and external system.
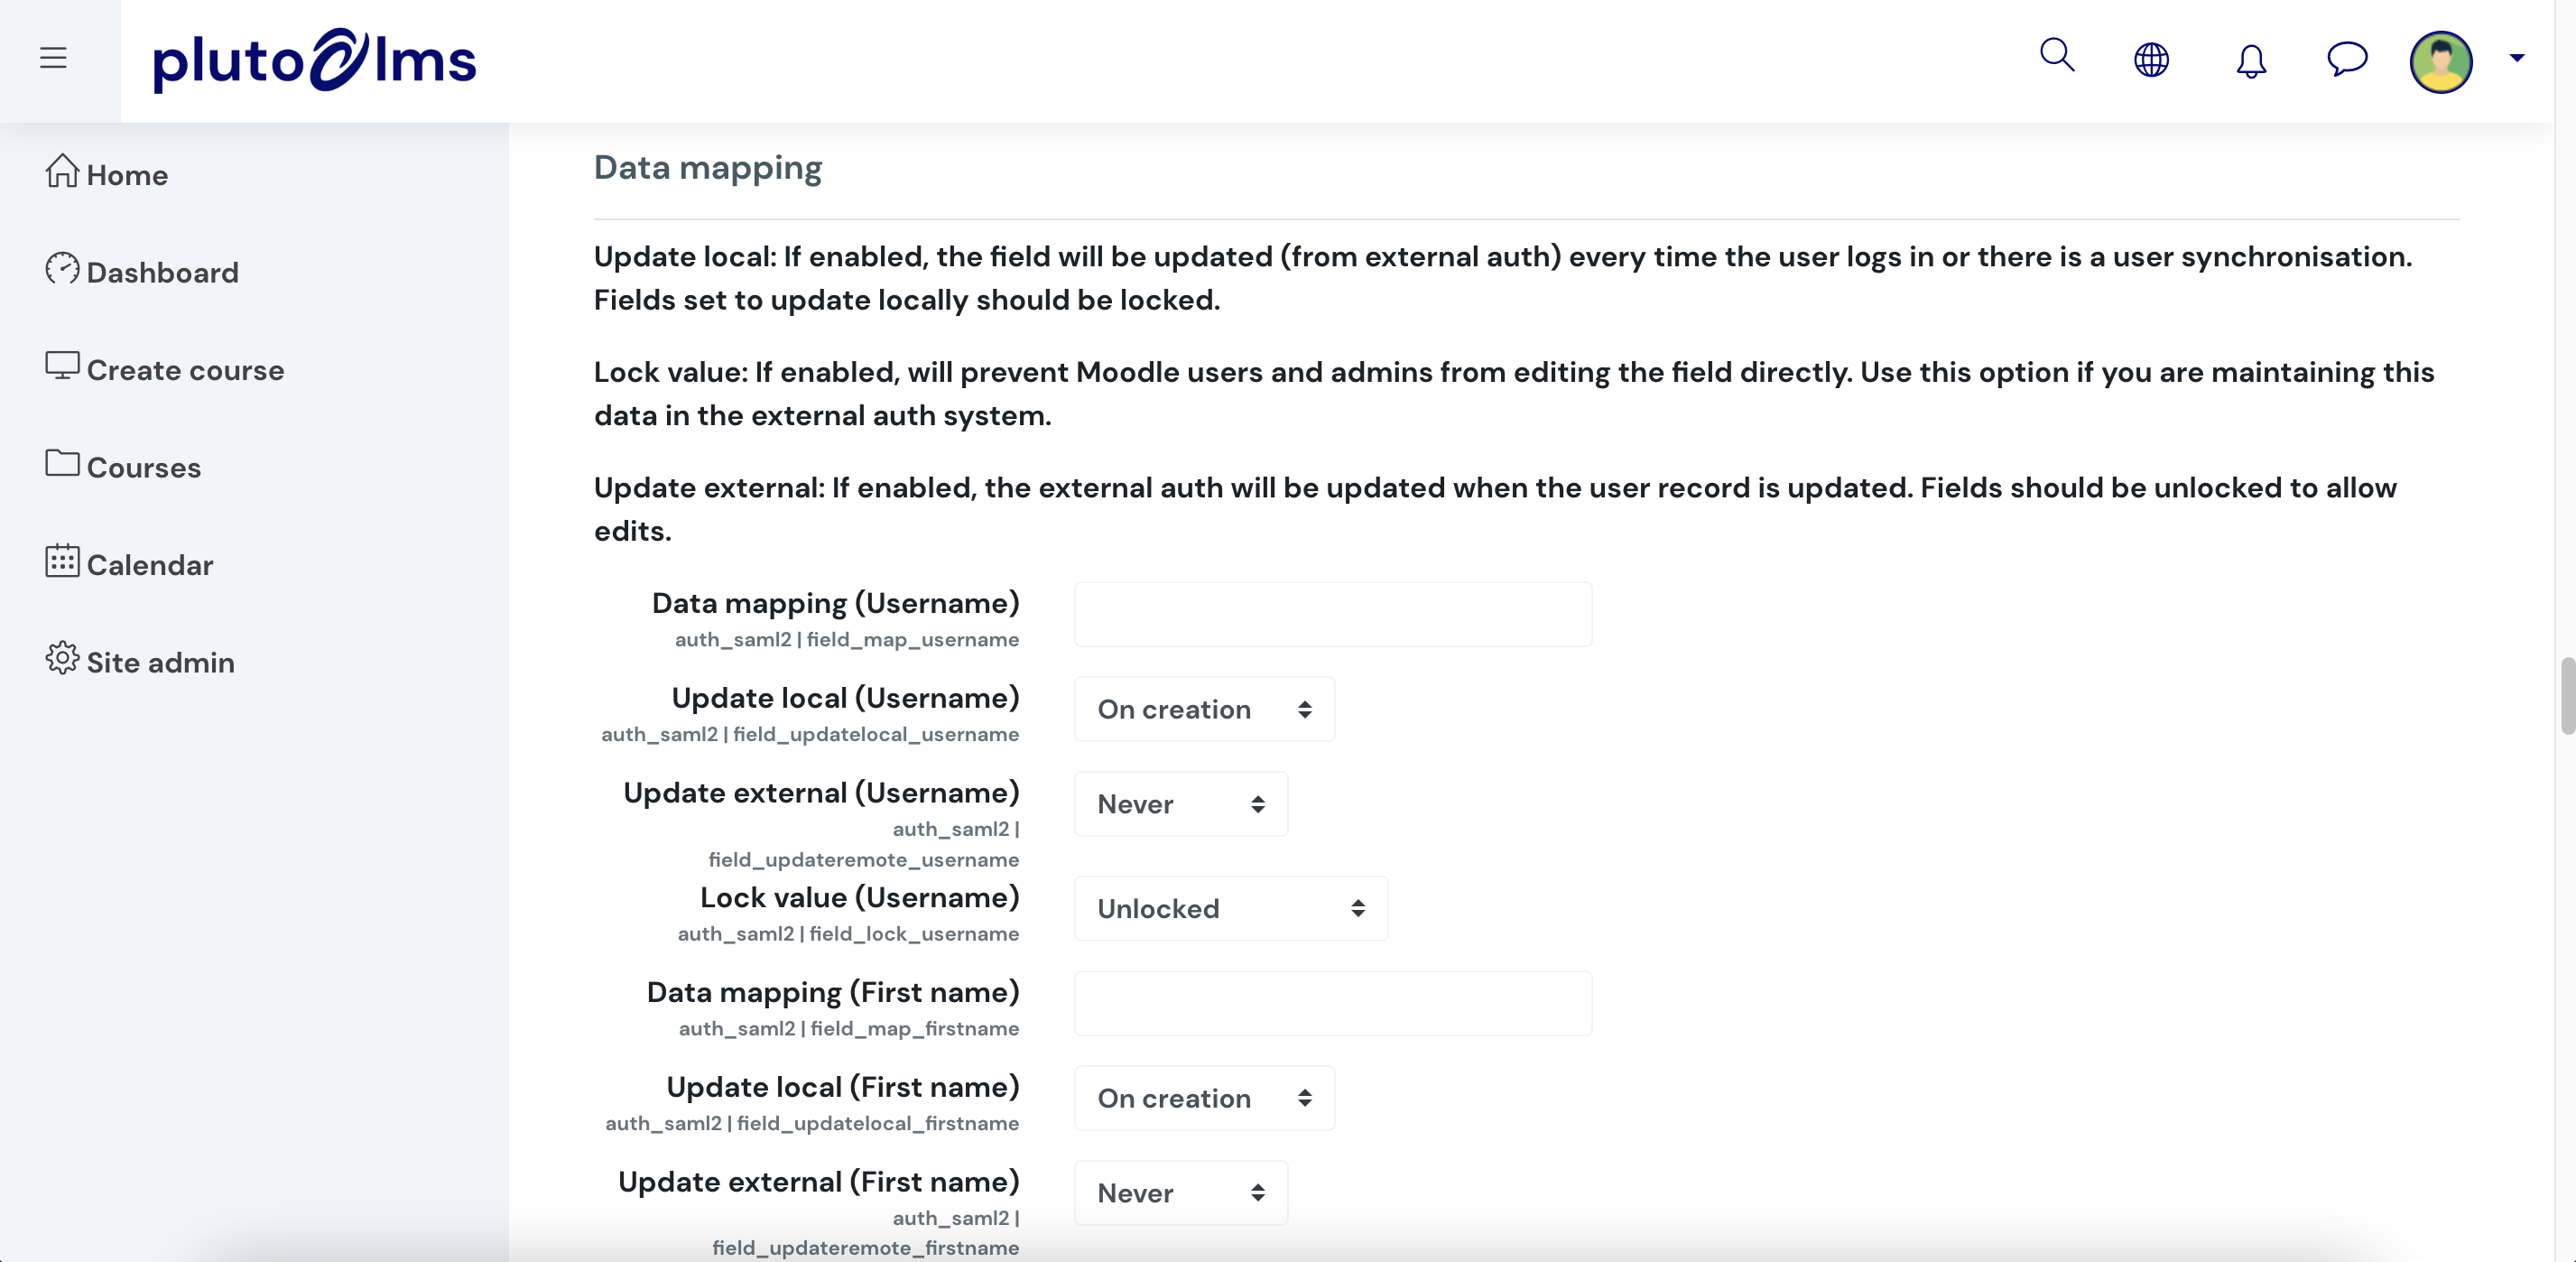
Once complete, click on "Save changes."
Step 4: Configure data mapping between Pluto LMS and external system.
Once complete, click on "Save changes."
Related Articles
Single Sign On
OVERVIEW Single sign-on (SSO) in a Learning Management System (LMS) for internal staff training is a streamlined authentication process that enables users to access the LMS and other related systems and applications with a single set of login ...